Another handmade bag using my own pattern - Handmade Peter Rabbit Handbag

Whatabout ye folks, it's Lee here. Back with another handmade bag using my own pattern. This time, I used a gorgeous fat quarter fabric from a Peter Rabbit bundle I found on Ebay. My brother keeps telling me that I should be selling my bags but so far, I've just been giving them away to family members or using them myself, lol. This bag is happily in the hands of our wee Mamma and she loves it.

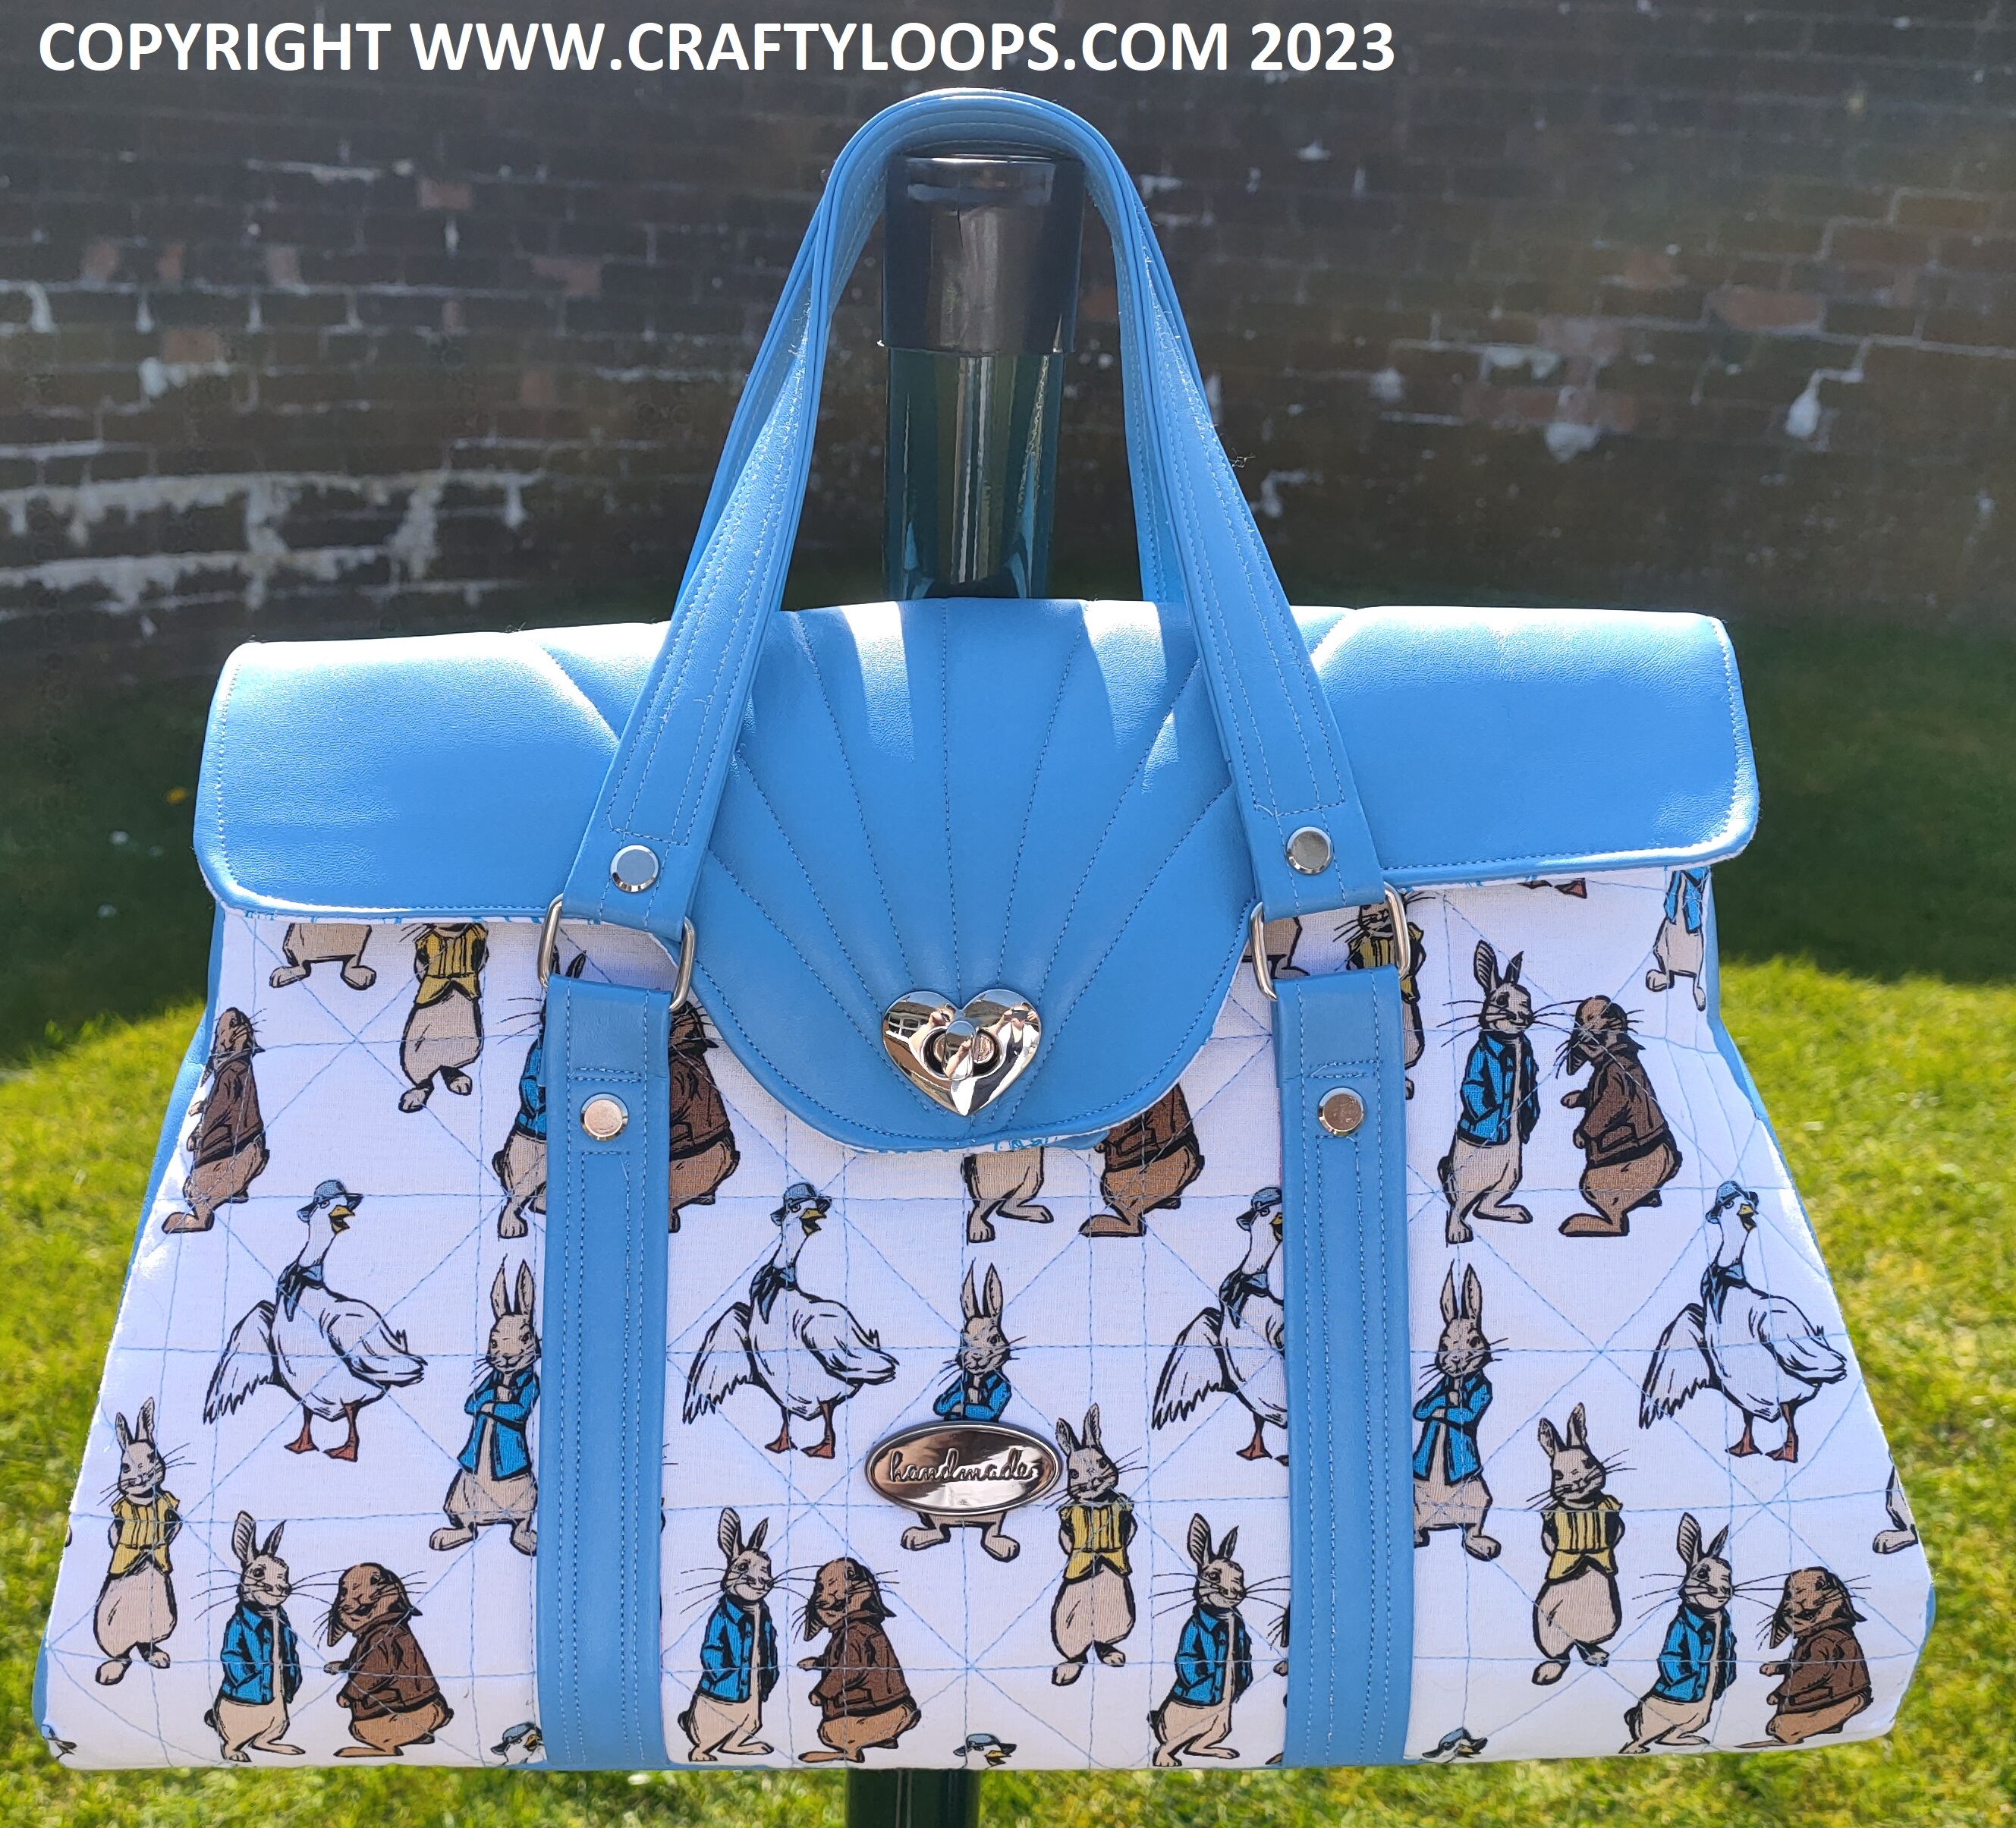
I used my same favourite sky blue faux leather (link below) but this time I wanted to do something a little more special with this faux leather and Peter Rabbit fabric. I think the thing that was missing from it was some texture. So, I found a fabulous tutorial on YouTube from Lavender & Twine Patterns showing a particular quilting pattern on the Alice Shoulder Bag, by Ora Rosa Patterns. As soon as I saw the design, I instantly fell in love with it. And in true Crafty Loops fashion, I thought to my overly confident self, "I can do that". Now, onto my usual admissions of mishaps, I will not show you the inside of that fabric where I drew and redrew these quilting lines that I somehow managed to do incorrectly way too many times teehee. But all I will say is, "Thank the wee man for heat erasable pens", because I must have drawn and erased and redrawn and erased these lines about 5 times, lol. I went through 2 heat erasable pens! **FACE PALM** The instructions were simple enough but my geometry deficient brain kept making mistakes and some lines wouldn't cross over each other perfectly, no matter what I did. So, I would draw the lines, make a mistake and thankfully, I used heat erasable pens, because my tiny wee iron was working overtime. By the way, I have linked to my wee mini iron that I use when sewing. It is such a great wee iron and it may be tiny and light, but it is mighty in ironing strength...and erasing lines that shouldn't be there, lol.

For the flap itself, I just quilted simple vertical lines as I thought the main quilting design would be too busy for the flap. I did do the quilting design on the Peter Rabbit fabric too but I don't think it is quite as obvious. But boy oh boy, what a lot of work it was to do all that quilting. Usually when I make one of these bags, I use 2 & 1/2 bobbins worth of thread. But the actual quilting alone took up almost 3 full bobbins. So, if you plan to quilt your bags yourself and are planning on selling them, factor in the price of 3 extra full bobbins worth of thread, plus all the time it takes you to not only draw on all the lines onto the fabric but then quilt it all too. It's surprising how much time and resources it actually takes up.

I love how this bag closes securely at the sides with the magnetic closures. And if you really didn't want it pleated like this, you can undo the magnets and pop out the edges to make it look more tote like in shape.

As this bag was Peter Rabbit themed, I thought a beautiful Floral fabric would be perfect for the lining in this bag. I found the most beautifully soft but thick cotton fabric on Ebay. I think it may have been a pair of curtains at one point. It's a vintage fabric from Grafton. It is such incredible quality cotton. Really thick so it will be very durable as a bag lining. Yet, it is soft to the touch too. I am really enjoying adding the wee swivel clasp next to the zipper pocket, onto my bags which is there to hook your keys onto. That way you don't have to rummage through your bag looking for your lost keys.


When it came to making my handles, I made them a bit too short (another admission of mishaps, lol). So, I thought I'd just make some more.....but quickly realised that I had used the last piece of this faux leather......nooooooo! But, I added the shorter handles anyway and it will just be a proper hand held handbag. There is enough room to hook it over your arm too, so hopefully it will be fine. If not, I will order more faux leather and if the shorter handles really do my wee Mamma's head in (I think that might be a NI term that most people won't understand), then once my order comes in, I can easily replace the handles for longer ones, for her.

I added the magnetic clasps as the bags main closure on each side of the bag. I just love the shape it gives to the bag. And my usual heart shaped turn lock on the flap for closing your bag securely.
I added the 4 rivets to the back of the bag flap again which, I really like. And yes, I did try my best to line the handle rivets up with the rivets on the back of the bag. I think I got it pretty damn close, if I do say so myself, lol.

Nothing much more to report really on this bag. I added 5 purse feet to this bag. The pattern sews up really well and I'm delighted with it. Sadly, this bag didn't get any piping like the last one, as I ran out of the fabric. But I think adding the piping definitely elevates the design of the bag so I think I will add this to all future bags of this design.
And that's it from me for now folks. Toodles Noodles.....Lee aka Crafty Loops xx
SHOPPING LIST
At the time of typing, the items I linked to are available. However, items stock changes all the time and with time marching by, some items I link may no longer be available from that particular seller. However, a quick Google search should help you out if my links are no longer working/available.
Bag pattern - I came up with it myself! So, there is no pattern to actually buy - sorry, lol
Teflon non-stick foot, Amazon- for sewing machine. Works great when working with faux leather. This foot works perfectly with my Janome QXL605 sewing machine
My mini iron, Duronic Travel Steam Iron SI2 - Amazon
Jeans Needle - Amazon
Fabri-tac glue - Sewprocrafts, Ebay
Personalised, handmade stamp - Stampingallday
5 & 1/2 inch Kai Scissors - Christie's Craft Shop, Ebay
Blue Faux Leather Fabric - Direct Home, Ebay
Woven Fusible Interfacing - Celloexpress - Ebay
Bosal single sided fusible foam - carogojo, Ebay or check out my page & email Carol directly for orders
A3 Craft Foam - Amazon (used for extra stability in the bag's base to provide more rigidity & shape)
Metal Handmade Label - Amazon
25mm Buckle sliders - Amazon
Heart shaped purse turnlock - Amazon
Chicago Screws - Amazon
12mm Purse Feet - Amazon
No. 3 zippers - from stash but purchased from private seller on Ebay
If you like my blog and would like to buy me a coffee, I have a ko-fi page. Don't feel obligated though, it's only if you want to. Every Ko-fi goes towards maintaining this domain and blog. If you do buy me a ko-fi, a massive thank you to you. You'll never know just how much I appreciate it xx

I have a YouTube channel, if you want to check it out, click on the image below

this is just stunning, maybe because it's my fave colour lol, the Peter Rabbit fabric suits it and there looks to be so much room inside, well done on all your quilting xx
ReplyDeleteThank you Tilly, you are always so kind. My wee Mamma loves this bag, so much so that she has asked me to make another one for my aunt. So they'll be running around town with matching bags, lol. Thanks for your lovely comment. Lee x
DeleteNice bblog
ReplyDelete