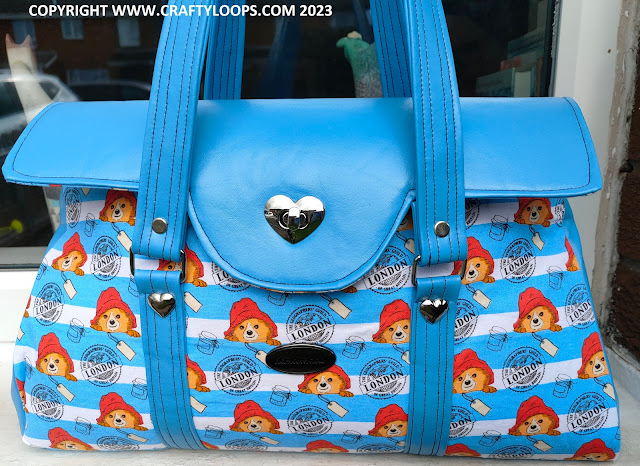
My own pattern - Handmade Paddington Bear Handbag

Whatabout ye folks, it's Lee here. Just a warning....this is a large post, filled with my waffling and stream of consciousness. So, buckle up Buttercup, make yourself a cup of strong coffee and a calorific snack and get ready for a long post. As I am sure you have seen, I've been a little obsessed with sewing bags and wallets lately. I was having a look around the interwebs for some inspiration as I have made a small amount of bags now and was wanting to broaden my horizons a bit and maybe consider making my own bag pattern....there we go again with my over inflated sense of competency in bag making, teehee. Anyway, I saw the most beautiful Audrey Hepburn inspired bag, called The Daisy from The Cambridge Sachel Company. The workmen-ship/workwomen-ship in this bag is simply stunning. It's simple in design but oh so stylish and sophisticated. I had a look around the internet to see if there was something similar from any of the bagmakers and I came across The Serafina from Shamballa Designs. It is very similar in style to The Daisy with a slightly different flap design and straps. There were different design features that I liked from both styles but differences that I would have preferred myself. I watched Kassia's tutorial on the construction of the Serafina Bag from SiaSwag on YouTube. Kassia is quickly becoming my go-to for bag making tutorials. If you want to learn how to make pretty much any bag, she is the lady to watch. Anywhoodles, I watched the tutorial and quickly thought to me wee self "I think I can come up with my own pattern with all the features that I want". Just to be clear, I am very new to this bag making stuff so, please do not expect perfection from me, particularly when it comes to making my own patterns as I have never made my own bag pattern before.....what am I thinking? teehee.
And so, armed with online inspiration, some A3 paper, a couple of quilting rulers and a sharp pencil I went to work designing my own bag pattern. I have to say, I was pretty pleased with my initial design. I only had to make a few minor adjustments and I had the design of bag that I wanted. On my first draft, I quickly did a mock-up of the bag just using some cheap poly-cotton that I had in my stash. I knew if this sewed together ok, it should work with my proper fabrics. But I realised that some of my gusset measurements were a wee bit off. So, after a small adjustment, I redrafted the pattern and off I went to my fabric cutting and sewing machine......full of so much confidence and practically no common sense whatsoever, teehee. What's that old saying? Fortune favours the brave? Well, this bag was the result of my unwavering bravery, teehee (more like my overly excessive tenacity to succeed). And considering this was essentially my mock up bag where any and all mistakes would be born, I was surprisingly delighted with how well it turned out. Now, as usual, I will admit my failures. I did have to unpick this bag around 3 times as I kept making silly mistakes and I wasn't happy with how the tops and sides were lining up. So, since making this particular bag, I have adjusted my original pattern again to compensate for the fitting errors that I wasn't happy with. But this trial bag still turned out pretty cute and I can use it out. It's passable as a bag, lol.


Still adapting to it's new shape but this will relax over time and with use the bag won't look so wrinkly here on the sides


I used another piece of Paddington fabric on the inside zipper pocket with my usual "handmade by" tag on the inside of the pocket.
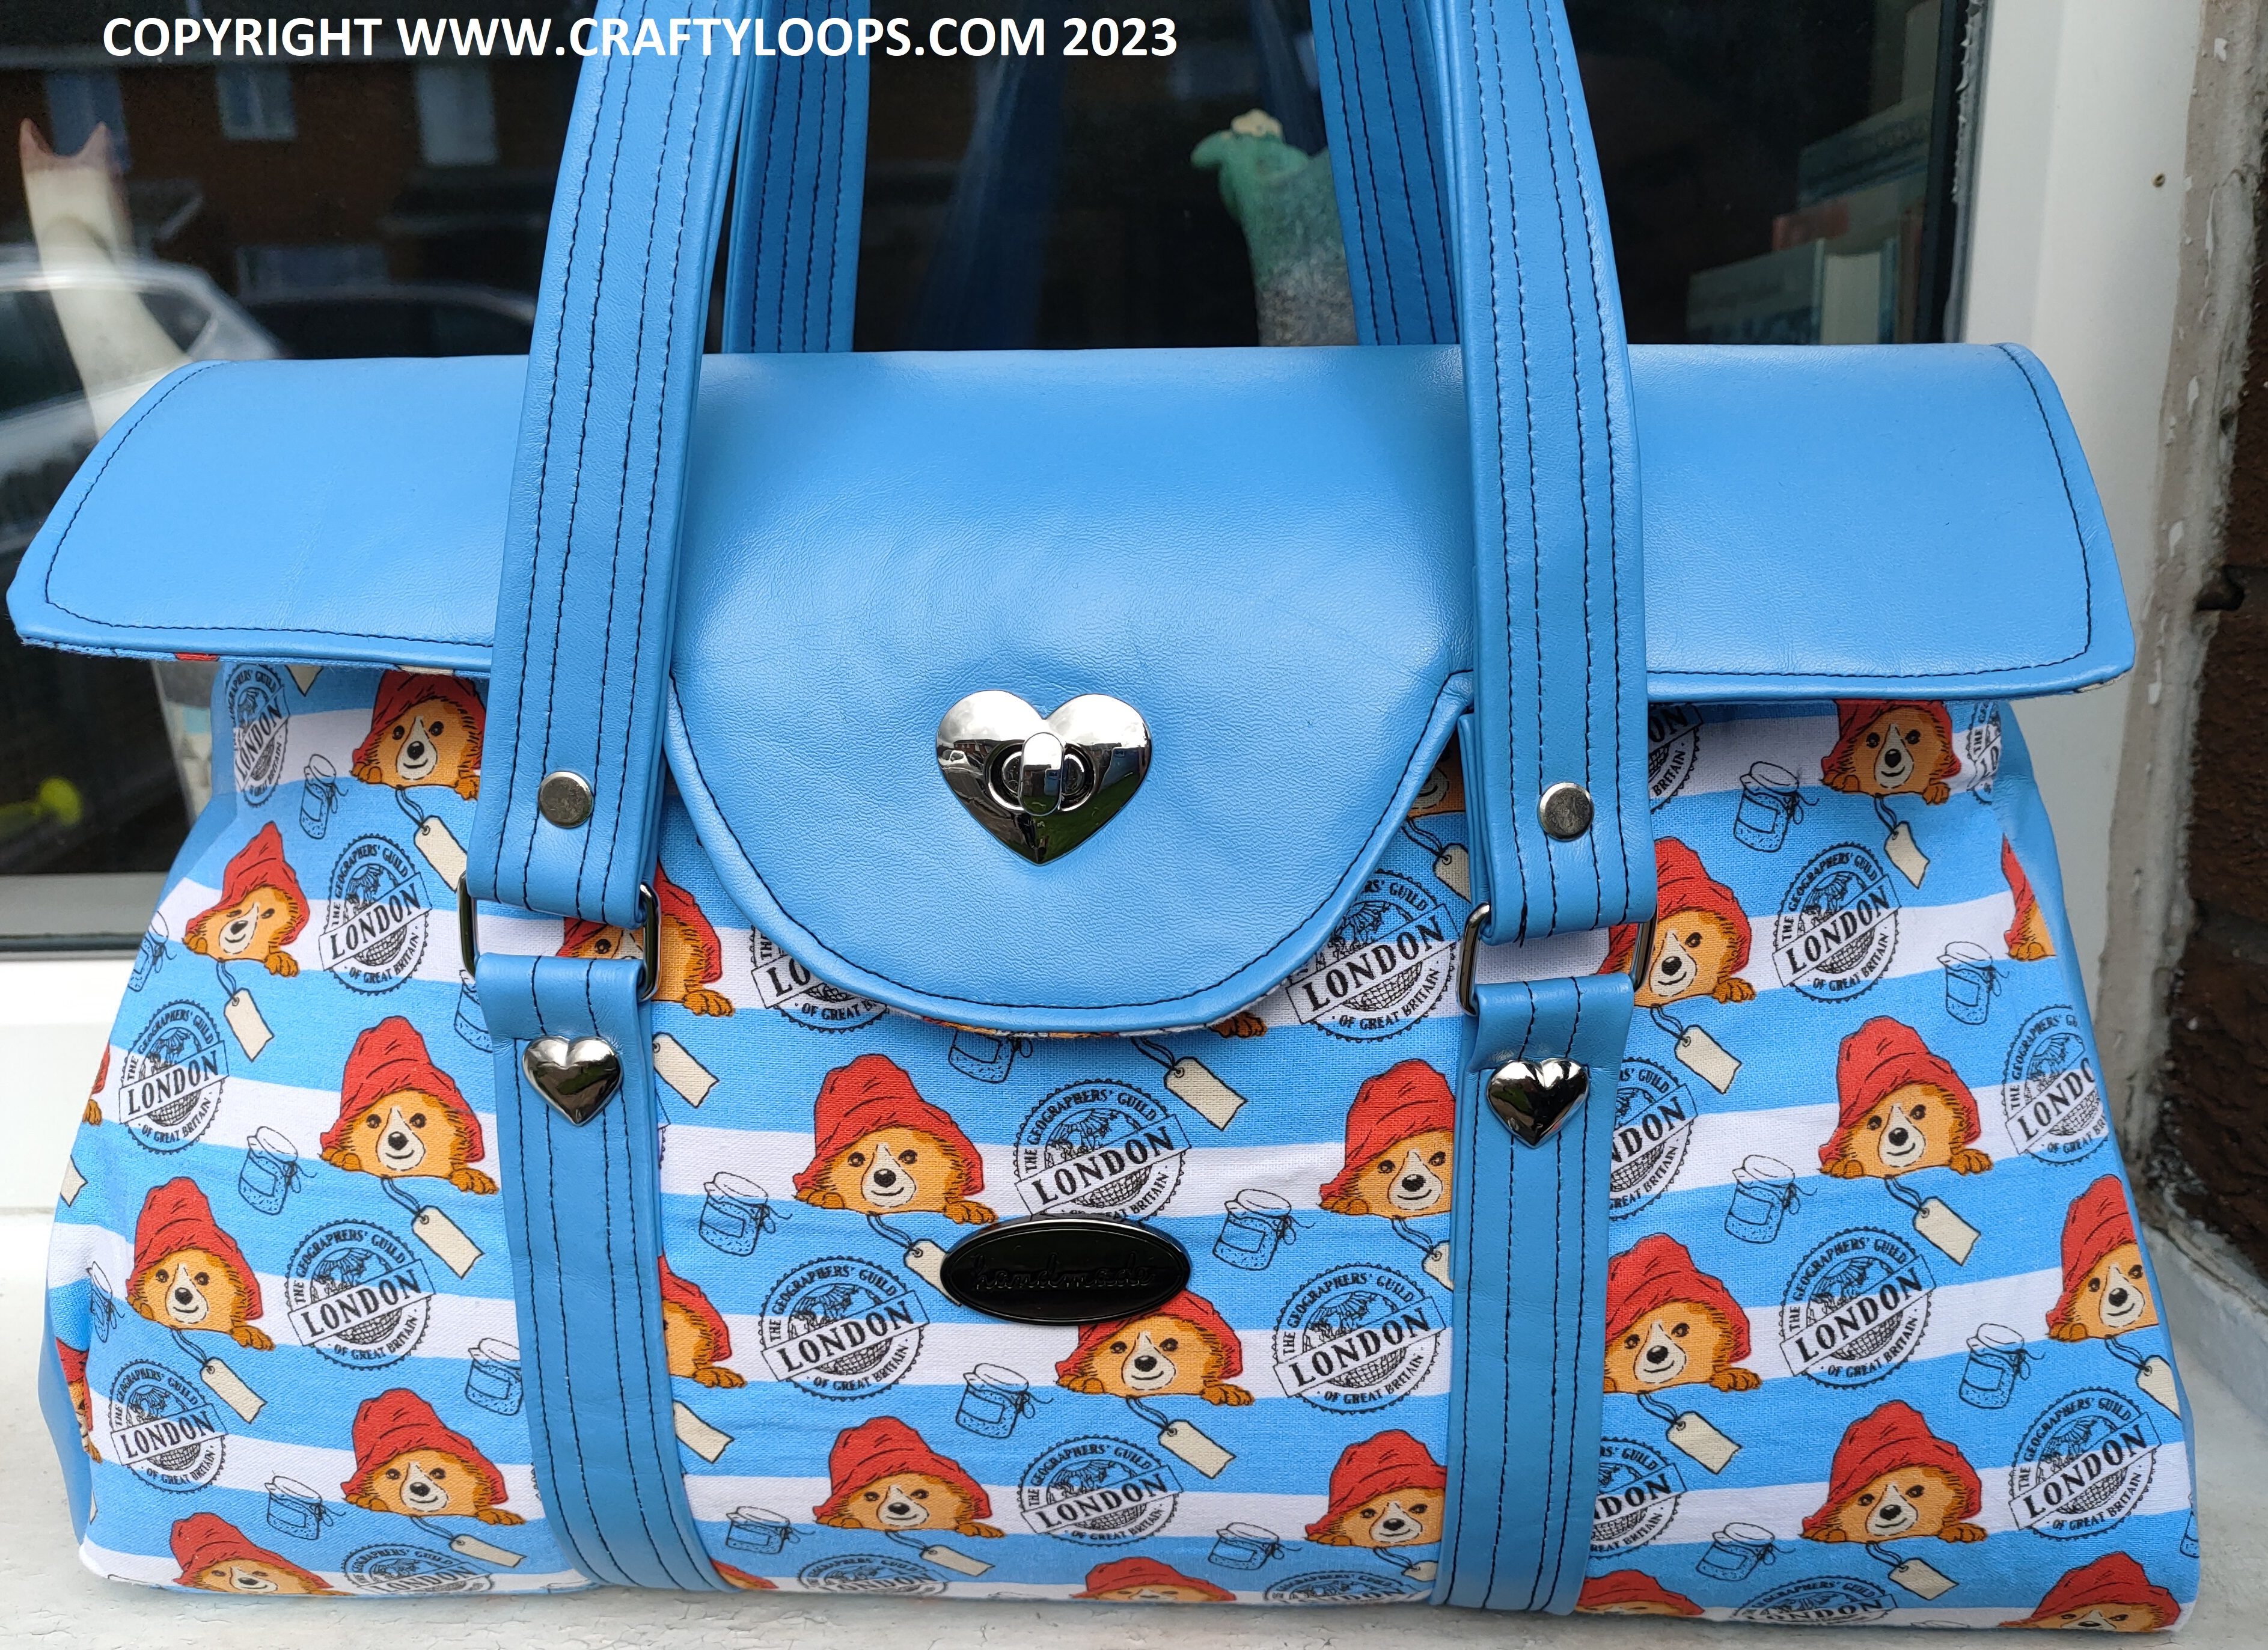
And as usual, the "Handmade" metal tag never seems to want to photograph clearly at all, teehee....but it is there. I love the hardware on this bag. The wee hearts are a lovely wee touch to the bag. I'm wondering if some piping around the bag might be a nice touch on the next bags I make in this design? I've never actually added piping to any bags that I have made myself......but I've seen it done in tutorials....there we go again with the over-confidence, teehee. I'm sure I could manage it ok. I have some cording and plenty of the faux leather so I definitely could have a go at making and adding piping myself. And sure, if it doesn't work....there's always my trusty seam ripper to save the day....or as I like to call my seam ripper, "Tempest, my temper tool", lol.
As I've said on numerous occasions before, when it comes to bag making, the prep work is the bulk of your time. Designing the pattern in itself is a lot of work. Then, cutting out the main fabric, then the lining, all the pockets and then all the interfacing and foam interfacing which then needs to be ironed and glued onto your fabric....phew! That takes up 80% of the work needed for bag making, The actual construction of the bag itself is not terribly complicated to sew together and comes together in what seems to be a much quicker time than all the prep work....or maybe it just seems quicker because the sewing part is definitely the much more enjoyable part for me.
Anywhoodles, this is the bag I came up with inspired by the wonderful bags I mentioned above. I do have another 2 cut out, all ready to go using 2 different fabrics and faux leathers. I am hoping that they will come together pretty quickly and without any unpicking of any kind, teehee. I am manifesting that the 2 new bags will be made up perfectly and without any errors......what are the chances, eh? It is me making them after all, teehee. I've also pondered the idea of adding a recessed zipper closure to the top. But that would require a good bit of rejigging of the pattern to accommodate that, so, maybe that is a project and pattern for another day. I'm also wondering about what name I should give my pattern? Maybe "The Audrey" handbag or "The Hepburn" handbag as it was inspired by the beautiful Audrey Hepburn? Any ideas or suggestions you have would be greatly appreciated as, I feel like my own pattern is going to be a firm favourite of mine and I feel like it deserves a name of it's own.
That's it from me for now folks, see you in the next one. Toodles Noodles....Lee aka Crafty Loops xx
SHOPPING LIST
At the time of typing, the items I linked to are available. However, items stock changes all the time and with time marching by, some items I link may no longer be available from that particular seller. However, a quick Google search should help you out if my links are no longer working/available.
Bag pattern - I made it! So, there is no pattern to actually buy - sorry, lol
Teflon non-stick foot, Amazon- for sewing machine. Works great when working with faux leather. This foot works perfectly with my Janome QXL605 sewing machine
Jeans Needle - Amazon
Fabri-tac glue - Sewprocrafts, Ebay
Personalised, handmade stamp - Stampingallday
5 & 1/2 inch Kai Scissors - Christie's Craft Shop, Ebay
Blue Faux Leather Fabric - Direct Home, Ebay
Paddington Bear Fabric - from a fat quarter bundle, sold by private seller on Ebay
Woven Fusible Interfacing - Celloexpress - Ebay
Bosal single sided fusible foam - carogojo, Ebay or check out my page & email Carol directly for orders
A3 Craft Foam - Amazon (used for extra stability in the bag's base to provide more rigidity & shape)
Metal Handmade Label - Amazon
25mm Buckle sliders - Amazon
Heart shaped purse turnlock - Amazon
Chicago Screws - Amazon
No. 3 zippers - from stash but purchased from private seller on Ebay
If you like my blog and would like to buy me a coffee, I have a ko-fi page. Don't feel obligated though, it's only if you want to. Every Ko-fi goes towards maintaining this domain and blog. If you do buy me a ko-fi, a massive thank you to you. You'll never know just how much I appreciate it xx

I have a YouTube channel, if you want to check it out, click on the image below

Comments
Post a Comment
Helloooooo! Anybody out there??!! Hey....there you are! Thanks for leaving a comment and stopping by my Blog. Lee x