HANDMADE SCRUNCHIES

Whatabout ye folks, it's Lee here. Look what's back in fashion! Not that scrunchies ever were out of fashion for me anyway....my hair is way passed my bum now so it's constantly wrap with scrunchies to keep me from strangling myself with my own hair, lol. My 2 nieces turn 7 years old this month and next month and I wanted to make them some scrunchies for their birthday's. Each of their hairdo's couldn't be more polar opposites, with one niece having blonde, shoulder length, Shirley Temple-like, corkscrew curls and the other has straight, brown/fair hair that goes way down her back. But every wee girl loves scrunchies for their hair and if not in their hair, they love the wear them on their wrists as accessories. You can find any amount of tutorials on YouTube on how to make scrunchies, but they are a pretty easy make and I made a tonne of them in no time at all. All you need is strips of fabric and elastic. These would be such easy and quick makes to sell at craft fairs or even online if you were so inclined.

As I am giving these scrunchies as gifts, I just made a simple little card to slip around 2 scrunchies. I stamped my own personal stamp on each card, that I got from Nicky at
Stampingallday. Ignore the scribbled out section on my stamp.....I (badly) edited out my surname, teehee. If you want to have your own personal stamp, please go over to Nicky's
website and tell her I sent you. I have used her stamps for well over a decade and her designs are incredible (this is not sponsored, by the way...just a personal recommendation). And if you aren't sure what you want or have a particular design in mind, do contact Nicky. She's incredibly accommodating and will help get you the personal stamp you want.
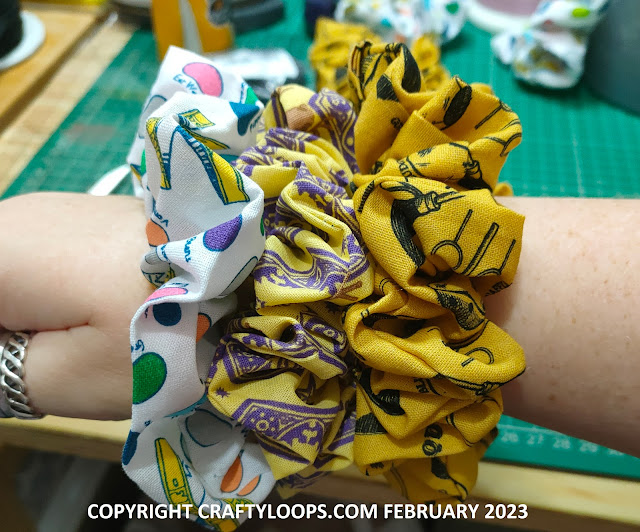
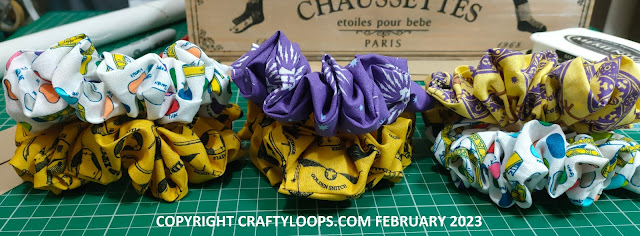
I used Harry Potter fat quarter fabric packs that I had in my stash to make these scrunchies. I wanted them to have plenty of volume so, I cut 4 inch strips from the longest length of the fat quarters. You should get 4 x 4" strips from each fat quarter. I took 2 of the 4" strips and sewed them together to make one really long piece of fabric (approx 44" long)
Fold the long strip of fabric in half, right sides together along the length and sew together at a 1/4" seam allowance the whole way down the length of the fabric. This will give you a very long tube of fabric that is open on both ends. Then, you have the ever so frustrating task of turning the fabric tube right sides out, teehee. Cut a piece of elastic, anywhere between 8-10 inches long and thread that through the long tube of fabric not forgetting to hold one end of your elastic to one end of the fabric, otherwise your elastic will just come out the other end and you'll have to rethread it through the tube again, lol. Tie the 2 ends of the elastic together (like you're tying a balloon) with a really tight knot to make the scrunchie into a circle. Shove one open end of the fabric inside the other and simply sew the opening closed to complete the scrunchie circle. Et Voila! You have a scrunchie made in just a few minutes.
If you would like me to share an actual tutorial, I'm sure I could do a photo tutorial for the blog here or even a quick wee video showing you just how I make my scrunchies. You can let me know in the comments, if that is something you want to see.
That's it from me for now folks. See you on the next one. Toodles Noodles....Lee aka Crafty Loops xx
If you like my blog and would like to buy me a coffee, I have a ko-fi page. Don't feel obligated though, it's only if you want to. Every Ko-fi goes towards maintaining this domain and blog. If you do buy me a ko-fi, a massive thank you to you. You'll never know just how much I appreciate it xx I have a YouTube channel, if you want to check it out, click on the image below


Comments
Post a Comment
Helloooooo! Anybody out there??!! Hey....there you are! Thanks for leaving a comment and stopping by my Blog. Lee x